ShopDreamUp AI ArtDreamUp

Deviation Actions


Suggested Deviants


Suggested Collections


You Might Like…


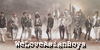
![[Process] EXO Baekhyun](https://images-wixmp-ed30a86b8c4ca887773594c2.wixmp.com/f/3c240104-e28d-4f4f-b1f4-9313691fefe3/d5dh7n6-6cb55acc-e8e3-40df-9100-1cab0ed3a9de.jpg/v1/crop/w_184,h_184,x_0,y_77,scl_0.12266666666667,q_70,strp/_process__exo_baekhyun_by_teralilac_d5dh7n6-92s-2x.jpg?token=eyJ0eXAiOiJKV1QiLCJhbGciOiJIUzI1NiJ9.eyJzdWIiOiJ1cm46YXBwOjdlMGQxODg5ODIyNjQzNzNhNWYwZDQxNWVhMGQyNmUwIiwiaXNzIjoidXJuOmFwcDo3ZTBkMTg4OTgyMjY0MzczYTVmMGQ0MTVlYTBkMjZlMCIsIm9iaiI6W1t7ImhlaWdodCI6Ijw9MzQxNCIsInBhdGgiOiJcL2ZcLzNjMjQwMTA0LWUyOGQtNGY0Zi1iMWY0LTkzMTM2OTFmZWZlM1wvZDVkaDduNi02Y2I1NWFjYy1lOGUzLTQwZGYtOTEwMC0xY2FiMGVkM2E5ZGUuanBnIiwid2lkdGgiOiI8PTEyODAifV1dLCJhdWQiOlsidXJuOnNlcnZpY2U6aW1hZ2Uub3BlcmF0aW9ucyJdfQ.rU-E3GpKFUfvAIkjXECRTh1oxk4uC77Z2N5f0YFGpIo)
![[Process] EXO Baekhyun](https://images-wixmp-ed30a86b8c4ca887773594c2.wixmp.com/f/3c240104-e28d-4f4f-b1f4-9313691fefe3/d5dh7n6-6cb55acc-e8e3-40df-9100-1cab0ed3a9de.jpg/v1/crop/w_92,h_92,x_0,y_38,scl_0.061333333333333,q_70,strp/_process__exo_baekhyun_by_teralilac_d5dh7n6-92s.jpg?token=eyJ0eXAiOiJKV1QiLCJhbGciOiJIUzI1NiJ9.eyJzdWIiOiJ1cm46YXBwOjdlMGQxODg5ODIyNjQzNzNhNWYwZDQxNWVhMGQyNmUwIiwiaXNzIjoidXJuOmFwcDo3ZTBkMTg4OTgyMjY0MzczYTVmMGQ0MTVlYTBkMjZlMCIsIm9iaiI6W1t7ImhlaWdodCI6Ijw9MzQxNCIsInBhdGgiOiJcL2ZcLzNjMjQwMTA0LWUyOGQtNGY0Zi1iMWY0LTkzMTM2OTFmZWZlM1wvZDVkaDduNi02Y2I1NWFjYy1lOGUzLTQwZGYtOTEwMC0xY2FiMGVkM2E5ZGUuanBnIiwid2lkdGgiOiI8PTEyODAifV1dLCJhdWQiOlsidXJuOnNlcnZpY2U6aW1hZ2Uub3BlcmF0aW9ucyJdfQ.rU-E3GpKFUfvAIkjXECRTh1oxk4uC77Z2N5f0YFGpIo)


Featured in Groups


Description
Even though I told you I'd go on some kind of hiatus, I might as well just post a new
drawing now and then if I got time, but at the same time I might not have the time needed
to reply to comments, messages, etc. So, please bear with me if I don't reply to your
comments before August/September! I will get back to them + I do read them and they
really motivate me to draw more. :>
As for this drawing/tutorial I wanted to show you how I've started to do my drawings – step
by step. Just below I have a description of each step and I hope it makes enough sense for
you to get my point. The drawing above actually took longer than I thought and it's been
such a while since I've drawn so many people (last summer I actually drew SEVENTEEN
all together in my sketchbook so I find it quite funny that I'm spending yet another summer
doing SEVENTEEN fanart) in one illustration. I enjoy it more than I thought, actually – drawing
only one person/character can make the artwork seem more still and somewhat boring, while
I feel like the meaning of the drawing can be deeper if there are more people interacting with
one another in it. Not sure if that makes sense but my point is, if you tend to draw portraits
like me and usually of one person at a time, you should definitely challenge yourself and make
the character(s) in your artwork(s) feel less lonely by giving them a new friend! It's really worth it!
Step 1:
I started out with a grid which is a very new thing for me but I thought it would help a lot
when you're using a reference picture, so I've started using that since my last drawing (the
birthday gift for Wonwoo). I also made the background neutral/gray; you should keep it in the
middle, in my opinion, no plain black (#000000) or white (#ffffff) background!
Step 2:
Then, I began sketching the members and I can tell you for sure that the grid helped a lot. This
is my first time drawing them all – except Wonwoo – realistically/semi-realistically so I'm still
not completely used to drawing their featuresweirdly enough since I've known them since
2013(?). For the sketch I just used the normal(?) brush called “Brush” which is next to the
“AirBrush” (unless you play around with SAI a lot).
Step 3:
To make it easier for myself later on, I added the background immediately (I forgot doing that
when drawing Wonwoo's birthday gift and me having used a single layer for the drawing didn't
make it any better). For the background, I used an airbrush for the darker parts and blended the
colors together with the blur tool.
Step 4:
Then, I began drawing the members with the method in the picture, e.g. at most times I went
with the "draw each box/grid one by one" method which means I would only focus on one box
per time, looking at the reference at the same time for colors, etc. I have to admit that method
takes longer than when I just draw freely but it's definitely more precise.
Step 5:
I finished drawing Wonwoo and decided not to go with any shadows/highlights on his clothes +
hair to make you focus more on his face and features, rather than the less important things. At
first I was actually intending to just shade the clothes and hair after having finished all their faces,
but I ended up not doing so, it seems.
Step 6:
I used the same method with Vernon and eventually finished him as well. Because of how difficult
it could get adding new colors onto a non-transparent part (of the layer used for Vernon), I also ended
up creating an individual layer for highlights – at that time, specifically for the highlights on his
nose bridge.
Step 7:
I finished Seungcheol as well on the same day as I drew Vernon!
Step 8:
At last, I drew Mingyu who's the one in the foreground. I have to admit that I think I got some of his
features wrong + compared to the others, the shadows on his skin also look overly blurred which is what
bothers me a little about this drawing (but other than that, I quite like it).
Step 9:
At last, to finish off the drawing, I added lots of small things which changed the drawing quite a lot (try
to compare the step 8 with step 9) – little by little. Rather than deleting the sketch layer completely, I just
removed the unnecessary lines (e.g. next to Wonwoo's nose) with an eraser. I also made the shadows look
darker with an overlay layer and added diamonds (since it is SEVENTEEN) to the background (the layer
is in overlay mode). I gave them halos as well (for a SEVENTEEN project I'm currently makinghopefully)
that are surrounded by stars and some glitter. To give the illusion of them wearing make-up (eyeshadow),
I added a little bit of redness close to their eyes with the airbrush in multiply mode. With yet another layer, since
I wasn't even going to shade or do anything with their hair, I eventually ended up giving it a bit of a darker color
through an overlay layer. Then, I added lots of highlights after having added a multiply layer to make it look like
the lights in the drawing is only coming from the back. I also added zippers on their jackets and gave the hair
a some texture with a custom brush + added a few thinner strands of hair.
So, eventually I liked how it turned out and I'm glad I didn't make them milk white (unlike last year where
my contrast was poor as well) but gave them much more natural skin colors. My favorites in the drawing
are probably Wonwoo and Seungcheol as I like how they turned out compared to Vernon + Mingyu. Also,
I've been asked before if I couldn't do any tutorials so I will most likely try to do something later on this
year. While I try to give myself ideas of what I could do as a tutorial, this is literally the only thing I can give you for now. This is just a quick walkthrough/”step by step” thing of how the things that are posted on here are done but I do want to post something more tutorial-like that has better descriptions. ; v ;
- Critique is appreciated -
drawing now and then if I got time, but at the same time I might not have the time needed
to reply to comments, messages, etc. So, please bear with me if I don't reply to your
comments before August/September! I will get back to them + I do read them and they
really motivate me to draw more. :>
As for this drawing/tutorial I wanted to show you how I've started to do my drawings – step
by step. Just below I have a description of each step and I hope it makes enough sense for
you to get my point. The drawing above actually took longer than I thought and it's been
such a while since I've drawn so many people (last summer I actually drew SEVENTEEN
all together in my sketchbook so I find it quite funny that I'm spending yet another summer
doing SEVENTEEN fanart) in one illustration. I enjoy it more than I thought, actually – drawing
only one person/character can make the artwork seem more still and somewhat boring, while
I feel like the meaning of the drawing can be deeper if there are more people interacting with
one another in it. Not sure if that makes sense but my point is, if you tend to draw portraits
like me and usually of one person at a time, you should definitely challenge yourself and make
the character(s) in your artwork(s) feel less lonely by giving them a new friend! It's really worth it!
Step 1:
I started out with a grid which is a very new thing for me but I thought it would help a lot
when you're using a reference picture, so I've started using that since my last drawing (the
birthday gift for Wonwoo). I also made the background neutral/gray; you should keep it in the
middle, in my opinion, no plain black (#000000) or white (#ffffff) background!
Step 2:
Then, I began sketching the members and I can tell you for sure that the grid helped a lot. This
is my first time drawing them all – except Wonwoo – realistically/semi-realistically so I'm still
not completely used to drawing their features
2013(?)
“AirBrush” (unless you play around with SAI a lot).
Step 3:
To make it easier for myself later on, I added the background immediately (I forgot doing that
when drawing Wonwoo's birthday gift and me having used a single layer for the drawing didn't
make it any better). For the background, I used an airbrush for the darker parts and blended the
colors together with the blur tool.
Step 4:
Then, I began drawing the members with the method in the picture, e.g. at most times I went
with the "draw each box/grid one by one" method which means I would only focus on one box
per time, looking at the reference at the same time for colors, etc. I have to admit that method
takes longer than when I just draw freely but it's definitely more precise.
Step 5:
I finished drawing Wonwoo and decided not to go with any shadows/highlights on his clothes +
hair to make you focus more on his face and features, rather than the less important things. At
first I was actually intending to just shade the clothes and hair after having finished all their faces,
but I ended up not doing so, it seems.
Step 6:
I used the same method with Vernon and eventually finished him as well. Because of how difficult
it could get adding new colors onto a non-transparent part (of the layer used for Vernon), I also ended
up creating an individual layer for highlights – at that time, specifically for the highlights on his
nose bridge.
Step 7:
I finished Seungcheol as well on the same day as I drew Vernon!
Step 8:
At last, I drew Mingyu who's the one in the foreground. I have to admit that I think I got some of his
features wrong + compared to the others, the shadows on his skin also look overly blurred which is what
bothers me a little about this drawing (but other than that, I quite like it).
Step 9:
At last, to finish off the drawing, I added lots of small things which changed the drawing quite a lot (try
to compare the step 8 with step 9) – little by little. Rather than deleting the sketch layer completely, I just
removed the unnecessary lines (e.g. next to Wonwoo's nose) with an eraser. I also made the shadows look
darker with an overlay layer and added diamonds (since it is SEVENTEEN) to the background (the layer
is in overlay mode). I gave them halos as well (for a SEVENTEEN project I'm currently making
that are surrounded by stars and some glitter. To give the illusion of them wearing make-up (eyeshadow),
I added a little bit of redness close to their eyes with the airbrush in multiply mode. With yet another layer, since
I wasn't even going to shade or do anything with their hair, I eventually ended up giving it a bit of a darker color
through an overlay layer. Then, I added lots of highlights after having added a multiply layer to make it look like
the lights in the drawing is only coming from the back. I also added zippers on their jackets and gave the hair
a some texture with a custom brush + added a few thinner strands of hair.
So, eventually I liked how it turned out and I'm glad I didn't make them milk white (unlike last year where
my contrast was poor as well) but gave them much more natural skin colors. My favorites in the drawing
are probably Wonwoo and Seungcheol as I like how they turned out compared to Vernon + Mingyu. Also,
I've been asked before if I couldn't do any tutorials so I will most likely try to do something later on this
year. While I try to give myself ideas of what I could do as a tutorial, this is literally the only thing I can give you for now. This is just a quick walkthrough/”step by step” thing of how the things that are posted on here are done but I do want to post something more tutorial-like that has better descriptions. ; v ;
- Critique is appreciated -
Image size
1736x1232px 1.22 MB
Comments16
Join the community to add your comment. Already a deviant? Log In
So then for color you just matched the color to whatever you saw in the grid? Or did you have to change or pick color at all?